Drupal 7 to Drupal 10: Full Step-by-Step Migration Guide and a Real-Life Drupal Migration Example
With the end of life of Drupal 7 coming in January 2025, it’s more important than ever to know how to migrate your website from Drupal 7 to Drupal 10.
That's why we decided to break down all the steps you need to have your Drupal 10 site ready before you are prone to security breaches, lack of client support, and updates to improve your visitors' experience—all risks associated with delaying your website's migration.
This article can be useful for all types of websites, but there's always the risk of not getting it right, especially if your website has too many components, lots of articles, or customized sections.
If you need help with a custom migration for your Drupal website, chat with us and let our expert team of Drupal developers help you achieve this and maintain your site’s performance.
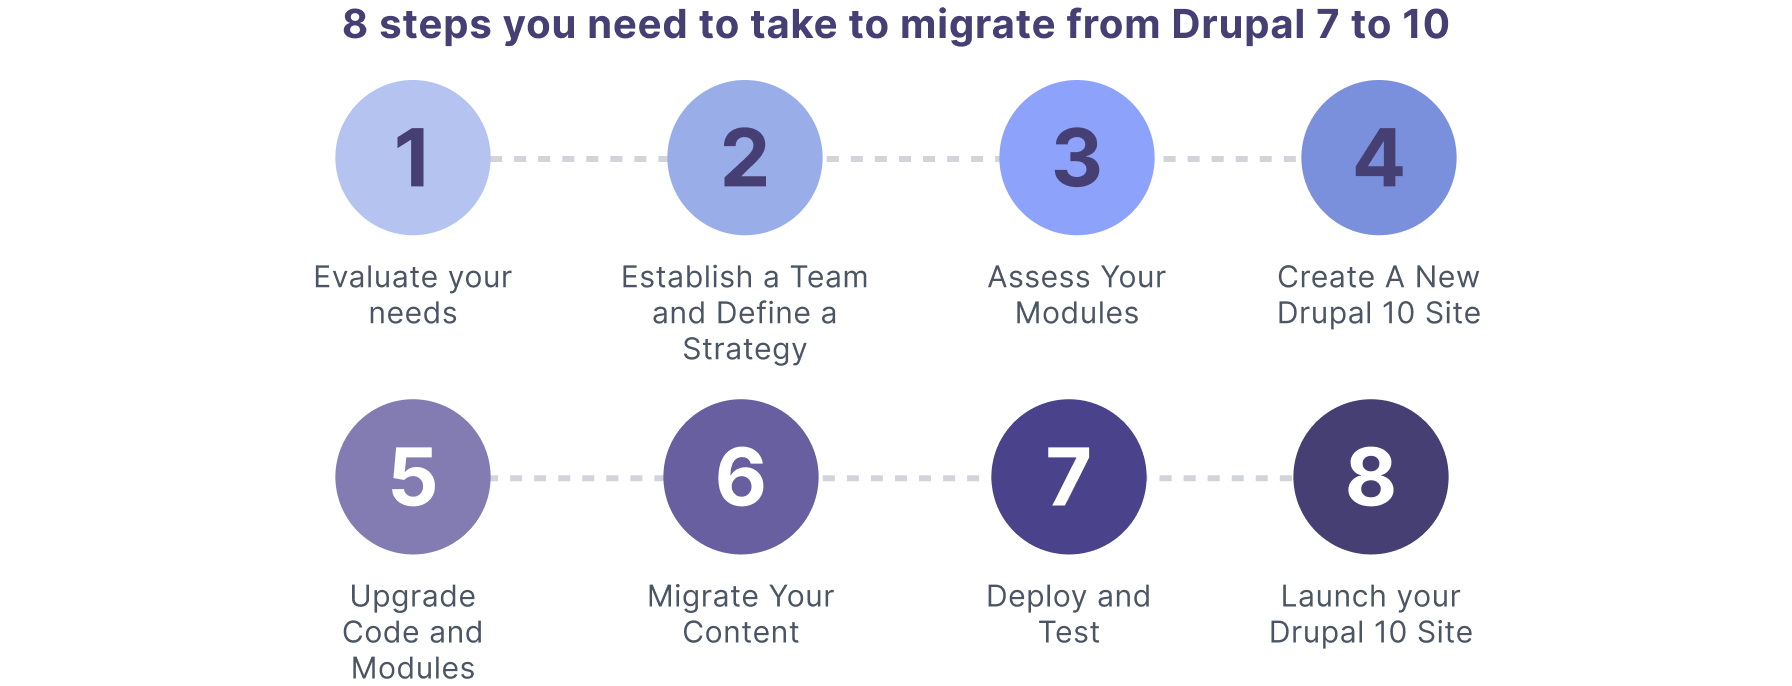
Let’s start with an outline of the steps necessary to successfully migrate your Drupal 7 site to Drupal 10.
What Do You Need to Migrate from Drupal 7 to 10?
Step 1: Evaluate Your Needs
Before starting your migration from Drupal 7 to Drupal 10, it’s important to envision what you aim to achieve with the new platform. Reflect on your current site's functionality, design, and UX, and determine what needs to be carried over, improved, or possibly discarded.
Why is this step important? This evaluation will serve as your roadmap, guiding the subsequent steps of the migration process.
Step 2: Establish a Team and Define a Strategy
Assemble a dedicated team comprising, at least, a project manager, Drupal developers, and QA testers, each bringing specific skills to the table. Define clear roles and responsibilities to ensure a smooth workflow.
The first thing we need to do before doing/coding anything is to define a strategy that outlines the migration path, including what we are going to migrate, which content types, if we are going to migrate users or not, if we are going to use the Media entity instead of the File entity, timelines, milestones, contingency plans, etc.
Why is this step important? This step is crucial because developing a strategy and assembling a team enables us to adopt iterative methods. This approach allows us to continually refine our tactics by enhancing or potentially eliminating specific elements in this migration plan.
Step 3: Assess Your Modules
Take a thorough inventory of the modules your current Drupal 7 site utilizes, identifying which ones are essential for functionality. Check the availability and compatibility of these modules with Drupal 10. For modules that are not directly transferable, explore alternatives or consider custom development.
Why is this step important? This step is crucial for ensuring that your new site retains its required functionalities without compromising on performance.
Step 4: Create a New Drupal 10 Site
To start the migration you need to set up a new Drupal 10 environment. Configure the basic structure, including content types, user roles, and core settings, laying the groundwork for the new site.
Why is this step important? This is an opportune time to re-evaluate the site's architecture for any potential improvements.
Step 5: Upgrade Code and Modules
Transition your custom code and modules to align with Drupal 10's updated APIs and coding standards. Due to the significant updates in Drupal 10, much of the code for your modules will need to be entirely rewritten, with the exception of some front-end sections.
Why is this step important? It's important to note that almost none of the code from the modules can be carried over directly; it must be completely rewritten. The only aspect that might be reusable is the frontend, though it too will require significant modifications.
Step 6: Migrate Your Content
Migrating content is a critical phase, involving the transfer of all your data, including users, nodes, files, and configuration settings. Conduct this step methodically, starting with less complex content types to refine the migration approach, before progressing to more intricate data structures.
Why is this step important? Migrating content properly ensures all your data, from users to settings, moves smoothly to Drupal 10, allowing you to perfect the process with simpler content first before tackling more complex structures.
Step 7: Deploy and Test
With the site now populated with content and functional modules, you have to carry out a rigorous testing phase. This includes functional testing to ensure all features work as expected, performance testing to verify the site operates efficiently under load, and security testing to safeguard against vulnerabilities.
Why is this step important? Your migration efforts won’t be enough if your website is not working properly. Make sure to take time to properly test your site, before launching.
Step 8: Launch Your Drupal 10 Site
Once testing is satisfactorily completed and all stakeholders have given their approval, plan for the official launch.
Why is this step important? This is the final step to migrate from Drupal 7 to 10. Congratulations on getting here!
1 Real-Life Drupal 7 to 10 Migration Example
In this section, we will try cover some of the most common scenarios and issues during a migration from Drupal 7 to 10, through a simple example: migrating some articles from D7 to D10.
Drupal 10 comes with a set of modules to help us with migrations: Migrate, Migrate Drupal, and Migrate Drupal UI. Migrate is the base module that could be used for migrations in general, from any source. Migrate Drupal and Migrate Drupal UI are more related to migrations between Drupal versions.
The Migrate module also provides a set of Drush commands to manage the migrations that we are going to use later.
How Does the Migrate Module Work?
The Migrate Drupal module provides migration files to migrate almost everything, like Views, Menus, Nodes, Taxonomies, Vocabularies, Users, Roles, etc.
The problem with the shipped migrations in the module is that they migrate everything, and we also need to have no content (empty site) in the new Drupal 10 site.
I won’t cover the Migrate module in detail here, but is important to know that we can divide each migration into 3 main steps:
- Extract phase is called source.
- Transform phase is called process.
- Load phase is called destination.
So, a usual migration definition will have these 3 steps. The source can be anything, CSV files, a JSON file, an API call, etc. In this case, it will be the Drupal source plugins.
Each module that creates new types of entities should provide the migration plugins for the source and destination, which is not always the case, but we have some contrib modules that provide extra source, destination, and process plugins.
The migrations are defined in YAML files, And we are going to use Drush commands to execute them, the most important commands are:
drush migrate:status– To know the status of the migrations.drush migrate:import– To execute the migrations.drush migrate:rollback– To revert migrations in case anything goes wrong.
Migrating Articles from Drupal 7 to 10
A successful migration from Drupal 7 to Drupal 10 depends on many aspects. All Drupal sites are different, and there is no magic recipe to accomplish the entire migration.
But to keep this example simple, we are going to migrate just one content type: articles.
Our experience as a modern web and app development agency has shown us that we should NEVER migrate everything from a legacy site as-is, for several reasons.
The primary reason is that an article migration presents a perfect opportunity to rectify design errors and other issues present in the legacy site, such as poor field names, an excess of content types, and the chance to utilize better field types, to name a few.
We have noticed that in 95% of cases, there is no need to code anything new; we simply need to define a good migration strategy using existing modules/plugins.
To do that we will need first to migrate users (nice to have) to maintain the author of the article, images (for the article images), and tags (to categorize the content).
We can resume this as follows (same order):
- Migrate Users.
- Migrate Files.
- Migrate Media Files.
- Migrate Tags.
- Migrate Articles.
In this example, we are going to use the following modules.
- Migrate (core).
- Drupal Migrate (core).
- Migrate Devel (contrib): Used to display debug data while we are doing the migrations.
- Migrate Plus (contrib): Provides some extra process plugins.
Initial Setup
Before starting with the migration we need to do a couple of things.
- Setup Database (required).
- Copy files (required).
- Create a custom module (required).
- Install Migrate Devel (optional).
- Disable Cache (optional).
Setup Database
We need to add a new database connection in the settings.php to connect with the Drupal 7 database, and, of course, the new Drupal site should be able to access it.
Add the following lines:
1
2
3
4
5
6
7
8
9
10
11
12
13
14
15
16
17
18
19
$databases['migrate']['default']

 = ['database' => '[DBNAME]',

 'username' => '[DBUSERNAME]',

 'password' => '[DBPASSWORD]',

 'prefix' => '',

 'host' => '[DBHOST]',

 'port' => '[DBPORT]',

 'driver' => 'mysql',

 'namespace' => 'Drupal\\mysql\\Driver\\Database\\mysql',

];
It’s important to notice that the DB name MUST be “migrate”, otherwise it won't work out of the box.
Copy Files
To migrate files, Drupal needs to have access to them.
To accomplish this, we are going to put all the files from sites/default/files of Drupal 7 into this new Drupal 10 site, under sites/default/files/legacy.
After the migration, we can delete this folder.
Create the Custom Module
We called this module example_migration, so we will create a new folder at web/modules/custom/example_migration, and then create a subfolder called migrations there.
The module will have the following structure:

Install Migrate Devel
This is not required but is a very useful module to see what is happening with the migrations, it provides debug information by adding the flag --migrate-devel on the migrate commands.
Disable Cache
During the development phase, it is a good idea to disable the migration cache, so, every time we modify a migration .yml file we do not need to clear the cache to reflect the changes.
Add this line in settings.php to avoid that:
1
$settings['cache']['bins']['discovery_migration'] = 'cache.backend.memory';Migrate Users
The user module (Drupal 10) comes with a source plugin (d7_user). which we are going to use in our module, it also comes with a migration file (d7_user.yml). but we will create a new one just to make some customizations:
1
2
3
4
5
6
7
8
9
10
11
12
13
14
15
16
17
18
19
20
21
22
23
24
25
26
27
28
29
30
31
32
33
34
35
36
37
38
39
40
41
42
id: example_users

label: Migrate users from Drupal 7

migration_tags:

  - Example

source:
  plugin: d7_user

process:

  skip_admin_user:

    plugin: skip_on_value

    method: row

    source: uid

    value: 1

  name: name

  pass: pass

  mail: mail

  created: created

  access: access

  login: login

  status: status

  timezone: timezone

destination:

  plugin: entity:user
This is the final migration file for users, the important parts are the source, the destination, and the process.
Usually, we will interact with this part of the process the most, since this is the place where we map the fields from the source to the destination.
In this case, it is very straightforward, all the field names from the source are very similar to the destination.
We will use the process plugin provided by Migrate Plus (skip_on_value), to skip the admin user from the migration:
1
2
3
4
5
6
7
8
9
  skip_admin_user:

    plugin: skip_on_value

    method: row

    source: uid

    value: 1
It’s important to note that we are not migrating the user IDs, so, the content from the legacy site will have different user IDs than the new ones.
This difference needs to be resolved in some way to maintain relationships with the content, which we’ll explain how to do so in the following migrations.
Migrate Tags
Similar to the Users, the taxonomy module provides the source plugin, destination, and a migration file that we can use, but as I explained we do not want to use this migration as is because we want to do some customizations.
So, we are going to create a new one, like this:
1
2
3
4
5
6
7
8
9
10
11
12
13
14
15
16
17
18
19
20
21
22
23
24
25
26
27
28
29
30
31
32
33
34
35
36
37
38
39
40
41
42
43
44
45
46
47
48
49
50
51
52
53
54
55
56
57
id: example_tags

label: Tags from D7

migration_tags:

  - Example

source:

  plugin: d7_taxonomy_term

  bundle: tags

process:

  name: name

  'description/value': description

  'description/format': format

  weight: weight

  parent_id:

    -

      plugin: skip_on_empty

      method: process

      source: parent

    -

      plugin: migration_lookup

      migration: example_tags

  parent:

    plugin: default_value

    default_value: 0

    source: '@parent_id'

  changed: timestamp

  langcode: language

destination:

  plugin: entity:taxonomy_term

  default_bundle: tags
In this case, both, source and destination support to indicate the vocabulary of the terms we are going to migrate.
Also, for taxonomy terms, we need to respect the hierarchy because a taxonomy term can have child terms. To resolve this we can use the migration_lookup process plugin to get the parent for the taxonomy terms.
We first store the parent id in the `parent_id` temp field and then use this in the `parent` field.
Migrate Images
To migrate images/files there are 2 main strategies. One is provided by Migrate Drupal and another uses a contrib module called Migrate Files.
Using the Migrate Drupal Core Module
Using this strategy we need to migrate ALL the files first (File entities), and then migrate the content that uses those files adding a relationship between both. In case that you want to use the Media module (Media entities) instead of Files entities, you will need to create another migration for the media entities using the same data source (we are going to explain this later).
Using the Contrib Module
Migrate Files (extended) allows you to migrate only the files used by the content, not all the files, and just one migration file (yml).
Unfortunately, to use this module we need to have the path or the URL of the file in the source information, which is not available in the d7_node source plugin, instead of the path we have a file ID, which references a File entity in D7 as you can see in the following image.
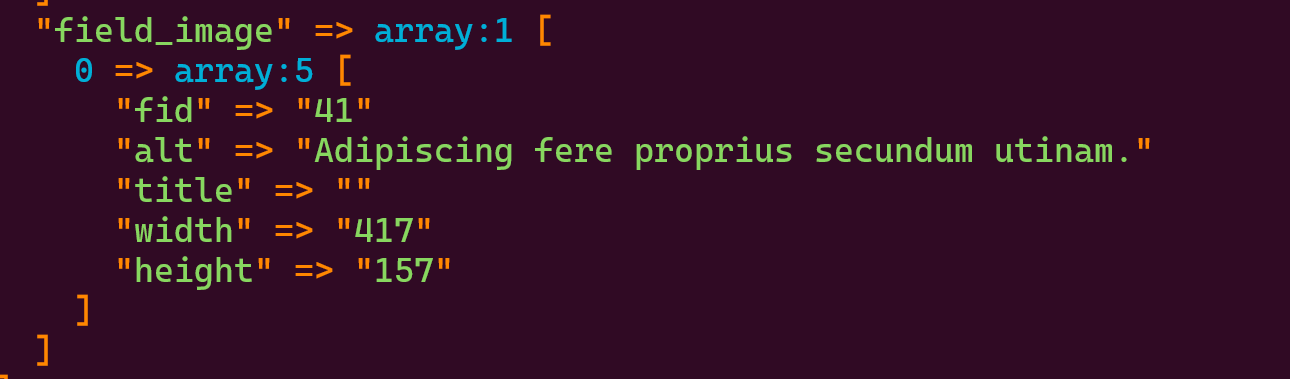
For that reason, we are going to use the first strategy. So, we will start migrating file entities using the following code:
1
2
3
4
5
6
7
8
9
10
11
12
13
14
15
16
17
18
19
20
21
22
23
24
25
26
27
28
29
30
31
32
33
34
35
36
37
38
39
40
41
42
43
44
45
46
47
48
49
50
51
52
53
54
55
56
57
58
id: example_files
label: Public files
migration_tags:
  - Example
source:
  plugin: d7_file
  scheme: public
  constants:
    source_base_path: ''
process:
  skip_on_value:
    plugin: skip_on_value
    source: filemime
    method: row
    not_equals: true
    value:
      - image/jpeg
      - image/png
      - image/gif
      - image/jpg
  filename: filename
  source_full_path:
    -
      plugin: concat
      delimiter: /
      source:
        - constants/source_base_path
        - filepath
    -
      plugin: urlencode
    -
      plugin: str_replace
      search: 'sites/default/files/'
      replace: 'app/web/sites/default/files/legacy/'
  uri:
    plugin: file_copy
    source:
      - '@source_full_path'
      - uri
  filemime: filemime
  status: status
  created: timestamp
  changed: timestamp
  uid:
    -
      plugin: skip_on_empty
      method: process
      message: 'No user for this file.'
    -
      plugin: migration_lookup
      migration: example_users
      source: author
      no_stub: true
destination:
  plugin: entity:file
migration_dependencies:
  required:
    - example_users
Here we are using again the `skip_on_value` process plugin to skip any file that is not an image:
1
2
3
4
5
6
7
8
9
10
 skip_on_value:
    plugin: skip_on_value
    source: filemime
    method: row
    not_equals: true
    value:
      - image/jpeg
      - image/png
      - image/gif
      - image/jpg
The file_copy process plugin will copy the file provided in the @source_full_path variable to the new destination:
1
2
3
4
5
6
7
8
9
  uri:

    plugin: file_copy

    source:

      - '@source_full_path'

      - uri
As we mentioned before, we need to establish a relationship between this File entity and the author, to do this the Migrate module provides the process plugin migrate_lookup.
The module maintains a table with a relationship between the old user ID and the new one, using this table the migrate_lookup plugin can get the right user id for this relationship.
The nostub key means that we do not want to create a new user if the uid does not exist. We are going to see this process plugin a lot in these examples
If we decide to use the Media entities instead of File entities we need to run another migration and add a relationship between the Media entity and the File entity using the same source plugin:
1
2
3
4
5
6
7
8
9
10
11
12
13
14
15
16
17
18
19
20
21
22
23
24
25
26
27
28
29
30
31
32
33
34
35
36
37
38
39
40
41
42
43
44
45
46
47
48
49
50
51
52
53
54
55
56
57
58
59
60
61
62
63
64
65
66
67
68
69
70
71
72
73
74
75
76
77
78
79
80
81
82
83
84
85
86
87
88
89
90
91
92
93
id: example_media_images

migration_tags:

  - Example

label: 'Migrate images to media'

source:

  plugin: d7_file

  scheme: public

  constants:

    source_base_path: ''

process:

  skip_on_value:

    plugin: skip_on_value

    source: filemime

    method: row

    not_equals: true

    value:

      - image/jpeg

      - image/png

      - image/gif

      - image/jpg

  name: filename

  field_media_image/target_id:

    plugin: migration_lookup

    migration: example_files

    source: fid

  field_media_image/alt: filename

  thumbnail/target_id:

    plugin: migration_lookup

    migration: example_files

    source: fid

  uid:

    -

      plugin: skip_on_empty

      method: process

      message: 'No user for this file.'

    -

      plugin: migration_lookup

      migration: example_users

      source: author

      no_stub: true

destination:

  plugin: 'entity:media'

  default_bundle: image

migration_dependencies:

  required:

    - example_users

    - example_files
The migration is almost the same as the one used for file migration, the difference is that we need to add the relationship between the File entity and Media entity, using this code:
1
2
3
4
5
6
7
field_media_image/target_id:

    plugin: migration_lookup

    migration: example_files

    source: fid
Migrate Articles
Finally, we are in good shape to migrate the Articles using the d7_node source plugin:
1
2
3
4
5
6
7
8
9
10
11
12
13
14
15
16
17
18
19
20
21
22
23
24
25
26
27
28
29
30
31
32
33
34
35
36
37
38
39
40
41
42
43
44
45
46
47
48
49
50
51
52
53
54
55
56
57
58
59
60
61
62
63
64
65
id: example_articles
label: Migrate Articles from Drupal 7
migration_tags:
  - Example
source:
  plugin: d7_node
  node_type: article
process:
  uuid: uuid
  langcode: langcode
  revision_timestamp: revision_timestamp
  revision_uid: revision_uid
  revision_log: revision_log
  status: status
  title: title
  created: created
  changed: changed
  promote: promote
  sticky: sticky
  default_langcode: default_langcode
  revision_default: revision_default
  revision_translation_affected: revision_translation_affected
  path: path
  field_image:
    plugin: sub_process
    source: field_image
    process:
      target_id:
        plugin: migration_lookup
        migration: example_files
        source: fid
  field_media:
    plugin: sub_process
    source: field_image
    process:
      target_id:
        plugin: migration_lookup
        migration: example_media_images
        source: fid
  field_tags:
    plugin: sub_process
    source: field_tags
    process:
      target_id:
        plugin: migration_lookup
        migration: example_tags
        source: tid
  body: body
  body/0/format:
    plugin: default_value
    default_value: basic_html
  uid:
    plugin: migration_lookup
    migration: example_users
    source: node_uid
    no_stub: true
destination:
  plugin: entity:node
  default_bundle: article
migration_dependencies:
  required:
    - example_users
    - example_files
    - example_media_images
    - example_tags
Run Migrations
After creating all the migrate YAML files, we need to run the migrations using the commands provided by the module.
We can run each migration manually in the right order one by one, but if we added the right dependencies (as we did) it will be enough to run the following command:
1
`drush migrate: import example_articles --execute-dependencies`Now that you know the step-by-step on how to migrate articles from Drupal 7 to 10, let’s review some of the consequences of not following through with your migration plans.
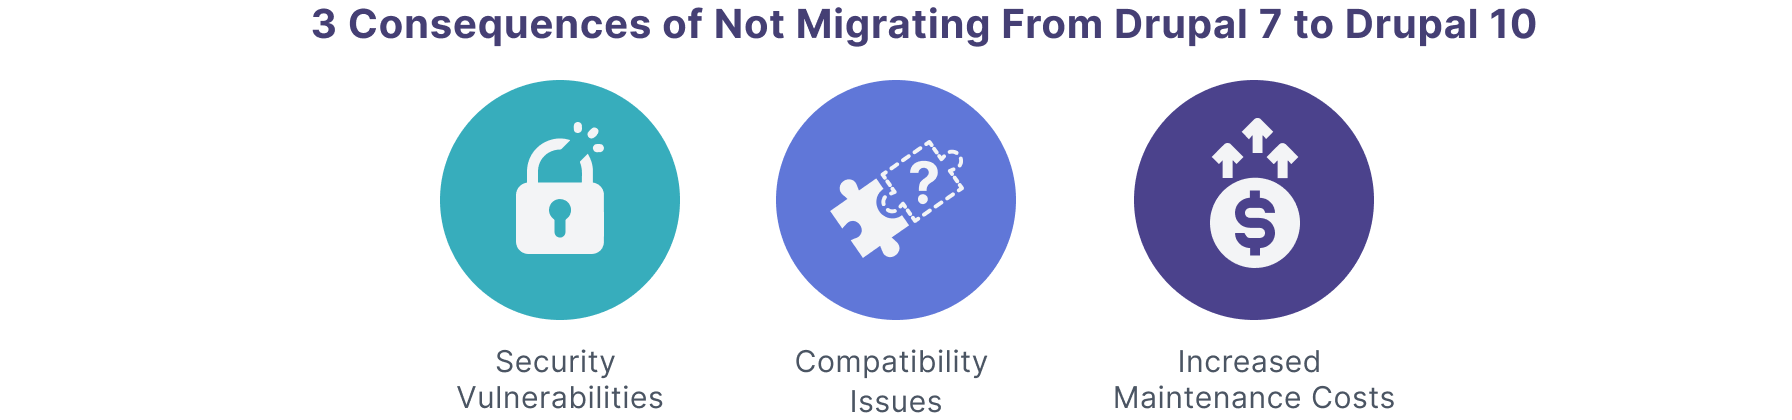
3 Consequences of Not Migrating from Drupal 7 to Drupal 10
Security Vulnerabilities: The greatest consequence of continue using Drupal 7 is no longer receiving security updates, leaving your site exposed to potential threats, as any new vulnerabilities discovered post-end-of-life won’t be addressed.
Why is this important? This jeopardizes your data and can also harm your reputation and trustworthiness among your users.Compatibility Issues: Continuing on Drupal 7 can also lead to compatibility problems with modern technologies and services.
Why is this important? This means finding it increasingly difficult to integrate new tools or services with your Drupal 7 site, affecting competitiveness and innovation.Increased Maintenance Costs: Maintaining an outdated system often incurs higher costs over time.
Why is this important? If you fail at migrating your site, finding support and solutions for Drupal 7 will only become more challenging and expensive.
How Our Drupal Expertise at Octahedroid Can Help with Your Site’s Migration
When it comes to migrating from Drupal 7 to Drupal 10, the technical complexities can be overwhelming–as we saw above–especially if you're operating at an enterprise level or if your platform is the heart of your digital experience.
We get this.
With more than 10 years of Drupal experience, our team of developers at Octahedroid is ideally positioned to facilitate your migration to Drupal 10. Our approach caters to users like you, who rely on Drupal's robust capabilities for managing intricate user permissions, workflows, and digital functionalities.
Here's how we can support your migration journey:
- Complex Data Migration: With extensive experience in handling large-scale, complex migrations, Octahedroid ensures a smooth transition of your diverse content types, views, taxonomies, and custom data structures, preserving the integrity and functionality of your digital ecosystem.
- Custom Module Adaptation: Understanding the critical role of custom code and contributed modules in your site, our team expertly adapts and upgrades these components for Drupal 10 compatibility, ensuring no loss in functionality or performance.
- Advanced User and Workflow Management: Leveraging Drupal 10's enhanced capabilities, we refine and optimize your user permission systems and workflows, improving efficiency and user experience in managing your digital operations.
- Strategic Third-Party Integrations: Whether it's integrating with external databases, CRMs, or specialized tools specific to your field, Octahedroid seamlessly connects your Drupal 10 site with the necessary third-party systems, expanding its functionality and reach.
- Ongoing Innovation and Support: Post-migration, our commitment to your success continues. We provide ongoing support for your Drupal 10 site, ensuring it remains secure, efficient, and ahead of the digital curve.
With Octahedroid’s expertise, you ensure your Drupal 10 site is not just functional but truly exceptional.
Let’s chat to start planning your Drupal migration!
Also, learn how to integrate an Adobe Marketo Engage form into Drupal in our article here.

About the author
Related posts
AI vs. Automation: What’s the Difference and How to Choose the Right Layer
By David Cespedes, July 10, 2026What is the difference between AI and automation, and how do you decide which layer belongs where? Here’s our practitioner’s decision framework from enterprise pipeline implementations.
What Is Business Process Automation and How to Define What to Automate First
By David Cespedes, June 16, 2026Business process automation works when you define the right processes first. We discuss how to identify automation candidates and avoid the most common failure modes from our enterprise experience.
What are the alternatives for organizations after Drupal 7’s End of Life?
Watch our on-demand webinar and get all the answers.